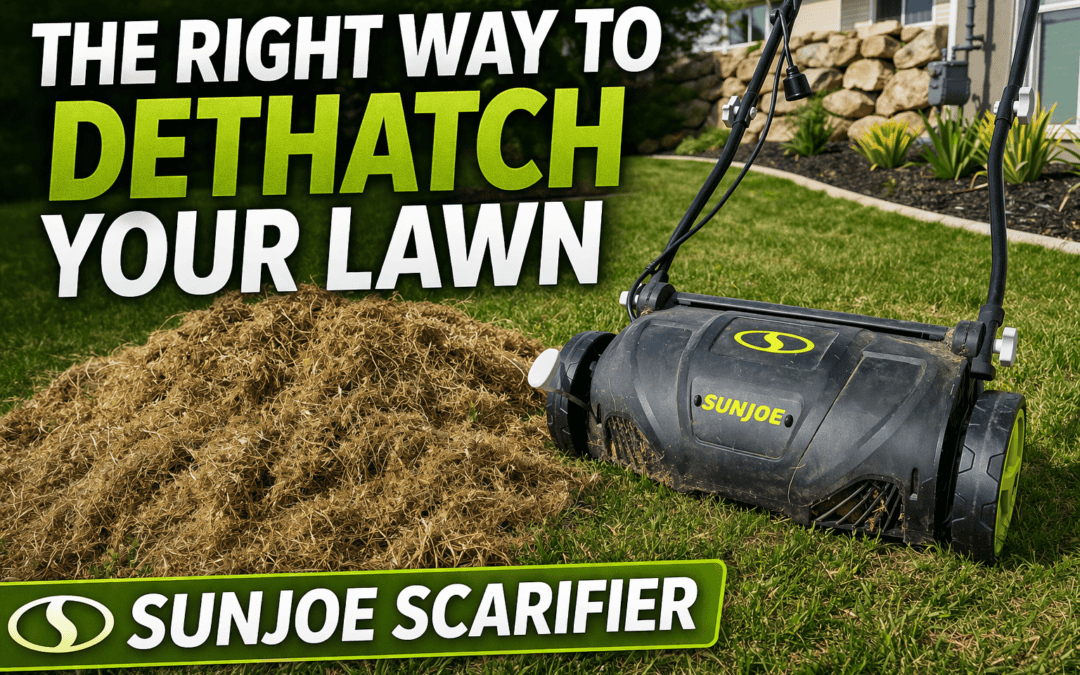
Spring is one of the best times to get back out in the yard and start working on your lawn. One project that can have a big impact on how your grass looks and grows throughout the season is dethatching and scarifying your lawn using a machine like the Sun Joe dethatcher and scarifier.
A thick thatch layer deep in your grass can block water, air, and nutrients from reaching the soil. Dethatching and scarifying help clear out that dead material, open up the lawn surface, and give roots more room to grow. That can help your grass thicken up and recover faster during the growing season.
In this guide, I’ll walk through exactly how to setup and use the Sun Joe dethatcher and scarifier, including unboxing, assembly, changing attachments, and what to expect when you use both the raking and scarifying attachments on a real lawn.
BUY 👉 Sun Joe Electric Dethatcher & Scarifier – https://amzn.to/4bVpdpd
(If you make a purchase using the links in this post, we may earn a commission.)
What Does Dethatching and Scarifying Do?
First, let’s talk a little bit more about why this lawn project is so important. Dethatching removes dead grass and debris that builds up near the base of the lawn. That thatch layer can get thick over time and make it harder for moisture, oxygen, and fertilizer to move down into the soil.
Scarifying goes a step further. It cuts into the surface a little more aggressively, which helps loosen matted material and open the lawn up for projects like overseeding or leveling. Although scarifying doesn’t get as deep as an industrial aerator (the little dirt plugs you see at public parks), it still can till the soil a couple of inches down and provide a form of aeration for residential lawns.
Both dethatching and scarifiying can be useful, but they do slightly different jobs.
Why Use the Sun Joe Dethatcher and Scarifier?
The Sun Joe dethatcher and scarifier is a popular tool for homeowners because it gives you two functions in one machine. You can switch between the dethatching attachment and the scarifier attachment depending on the condition of your lawn and the type of project you’re doing.
After using older versions of this Sunjoe dethatching machine for years, I finally bought one for myself. This was not sent to me. I paid for it with my own money, so this unboxing, assembly, how-to guide and review is based on real use in my own yard.
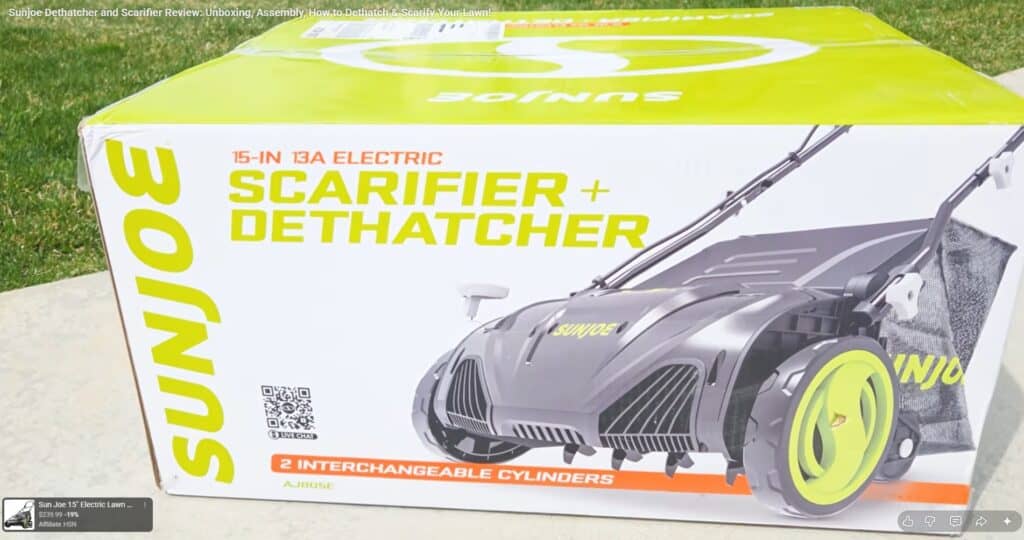
What Comes in the 15in 13A Electric Sunjoe Dethatcher/Scarifier Box?
When you start to unbox the Sunjoe dethatcher you’ll find:
- The main Sunjoe dethatching unit
- The upper and lower handle pieces
- The collection bag
- Extra knobs, screws, and bolts
- The instruction manual
- One attachment (either the dethatching rake or the scarifier blades) installed on the unit
- One other attachment (either the scarifier blades or the dethatching rake) that is not pre-installed
The newer 15inch Sunjoe scarifier model comes with the scarifier attachment already installed. The dethatching attachment is packed separately in the box.
How to Assemble the 15-inch, 13A Electric Sun Joe Dethatcher and Scarifier
Assembly is pretty straightforward on this 15-in 13-amp electric Sunjoe dethatcher, especially if you pull everything out of the box and have it in front of you while going through the manual. That being said, there were some parts of the manual that were a little unclear, and it took some trial and error to figure them out.
Follow along either in my video above or the notes below to make assembly of the Sunjoe dethatching machine a cinch!
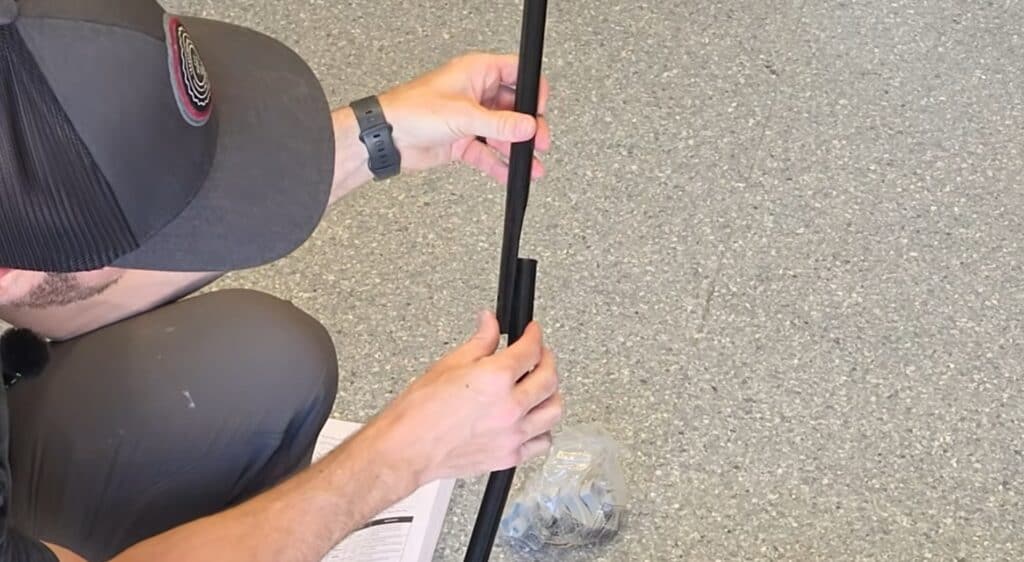
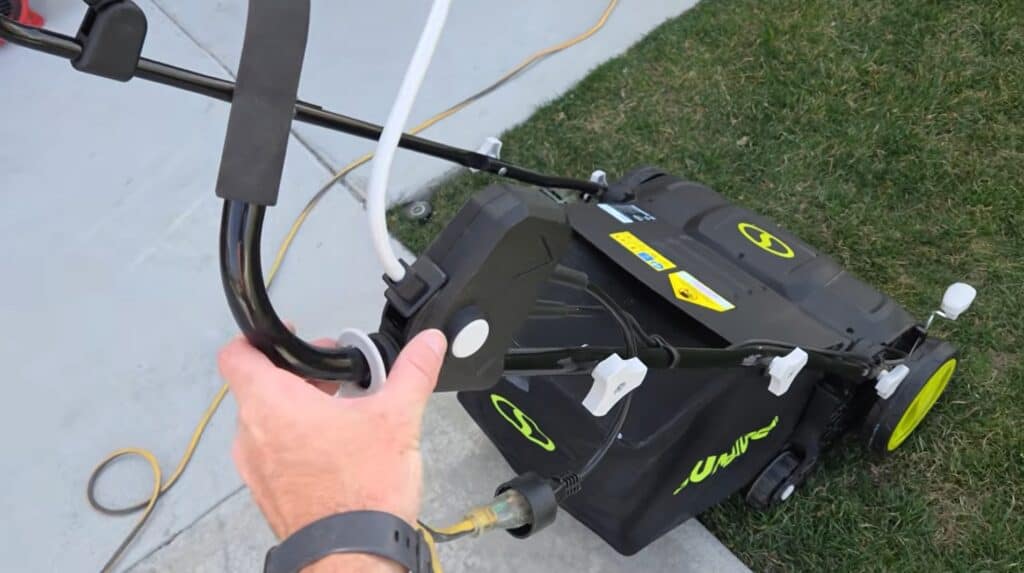
1. Attach the lower handle bars
Start with the angled lower bars. One side has a square hole and the other has a circular hole. The square hole should be at the top, and the circular hole should go at the bottom. Also, they both should be angled in towards the machine as they go back from the main unit.
See picture below:
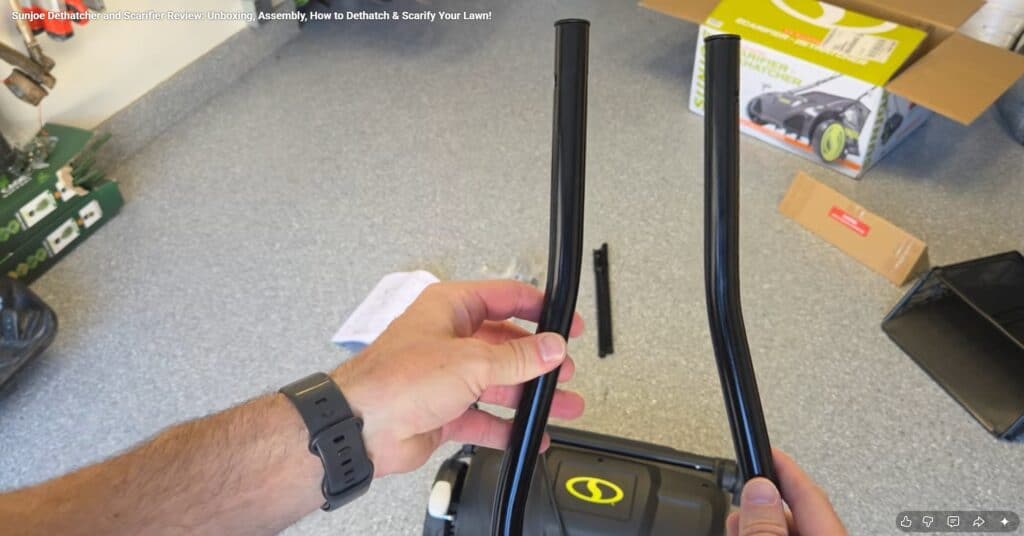
Remove the knob from the gear that’s attached to the SunJoe machine, line the angled handle bar up with the bolt (circular hole), and tighten it back down with the knob. Repeat on the other side.
You can also choose your handle height at this step. The Sun Joe dethatcher handlebar has three height positions for the handlebars (low, medium or high), so you can set it where it feels the most comfortable. When I used it, I picked the medium setting for handlebar height, and that seemed perfect.
2. Attach the straight middle bars
Next, connect the straight bars to the lower bars. The narrower side should face outward. Line up the square holes, insert the bolts from the inside, and tighten them with the knobs.
3. Attach the top handle
The top handle is the section with the safety bar and start controls. This is a little bit tricky with one person (it would be easier with two), but you can set the top handle on top of the middle bars and it should stay there unless you move it around too much.
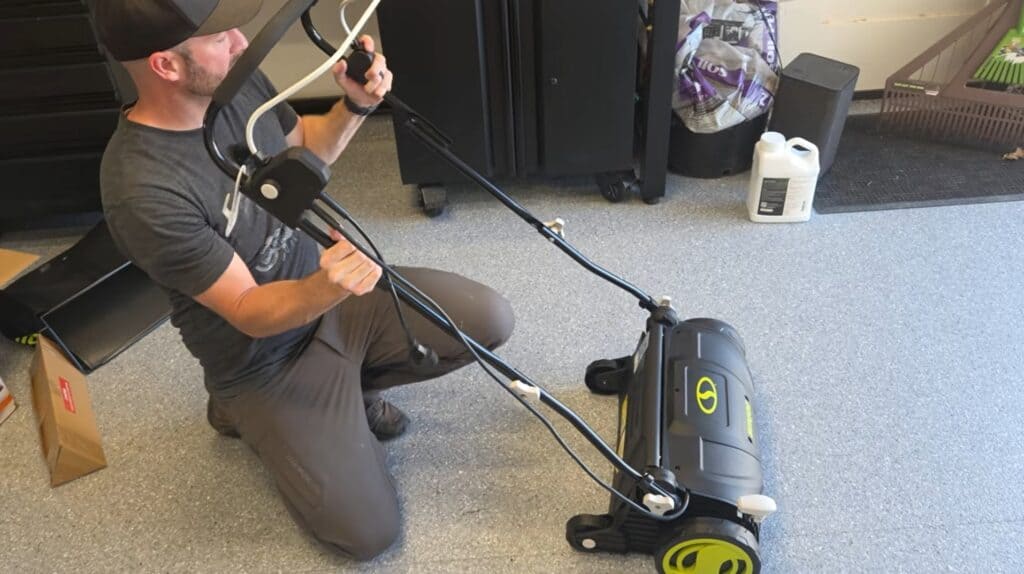
Line that top handlebar up with the middle bars and use the last bolts (going from the inside) and knobs to secure it.
4. Secure the cord clips
The 15 inch Sunjoe machine includes cable clips to help keep the cord attached to the handle. One of them can be a little hard to open (you may need to use some pliers to prop it open like I did), but once both clips are on, the cord will stay much more organized while you work.
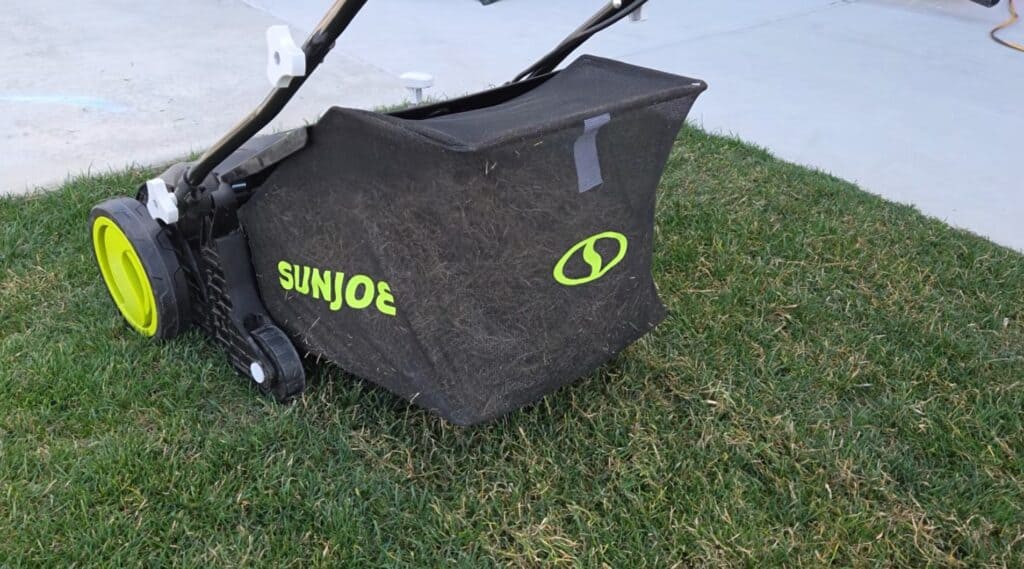
5. Attach the thatch collection bag if you want to test it
The Sunjoe scarifier bag installs like a mower bag. It slides into the slots at the back of the machine.
You can use it if you want, but I’ll be honest here: the bag is still not one of my favorite parts of this tool. It typically is too small, has to be unloaded too often, and doesn’t even pick up all of the thatch so you have to do a final cleanup on the yard anyway.
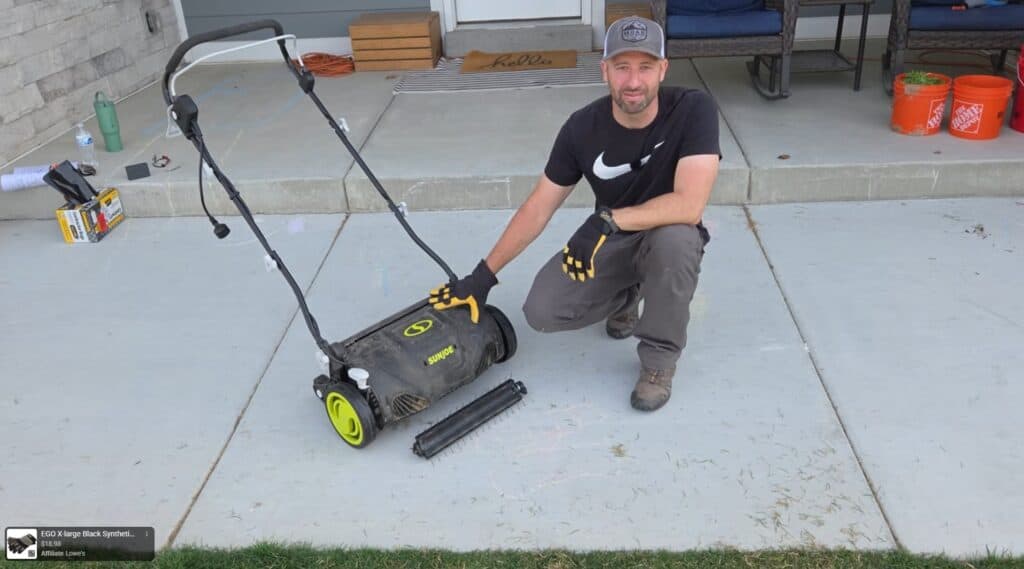
How to Change the Rake/Blade Attachments
The 15inch electric Sun Joe scarifier and dethatcher uses two different attachments:
- Raking (tines) attachment for dethatching
- Scarifier (blades) attachment for more aggressive lawn cleanup and surface slicing
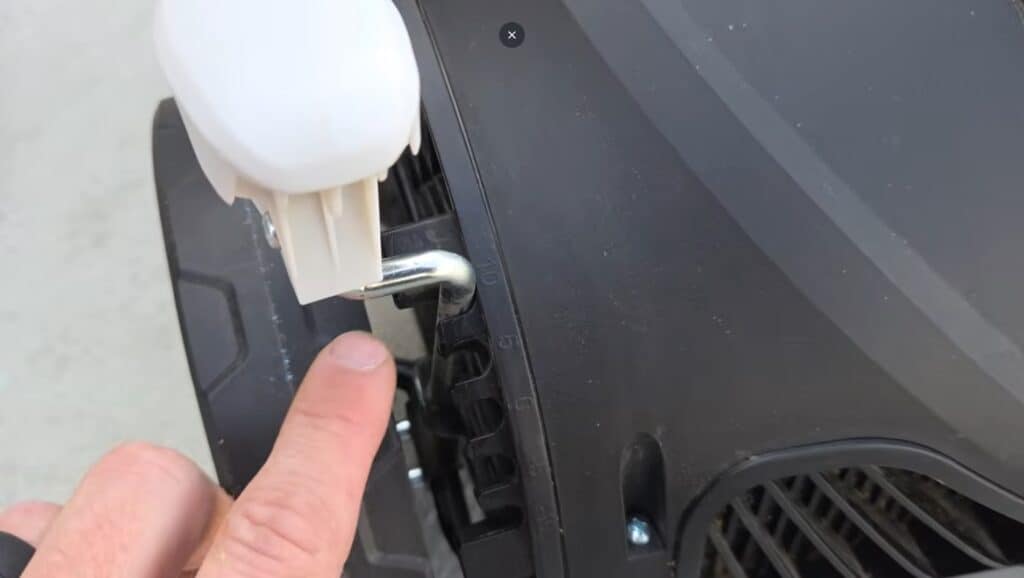
To swap attachments on the Sunjoe, turn the machine over on its side, and find the two bolts at the top of the attachment.
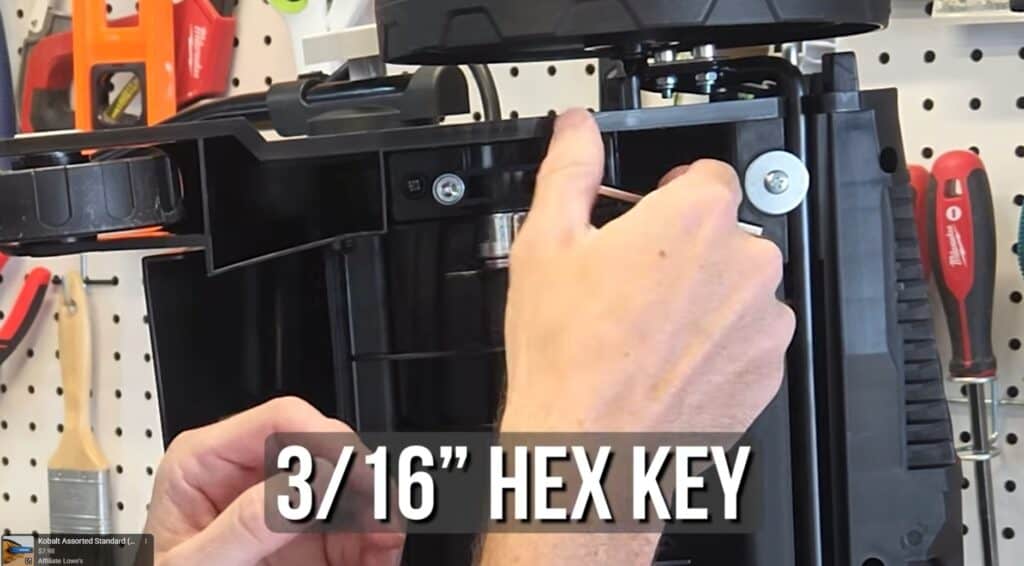
Loosen the two bolts with a 3/16 Allen wrench (or the included hex key in the package – mine didn’t come with one but the manual says it is included). Then pull out the installed attachment, keep track of the hex bolts and hardware pieces, and slide the other attachment into place. Tighten everything back down before using the Sun Joe machine.
The dethatching attachment uses thinner tines. The scarifier attachment uses thicker metal blades.
How to Prepare Your Lawn For Dethatching with the Sunjoe
Before using the Sun Joe on your grass, it helps to prep the lawn first.
Mow the lawn low
I like to scalp the lawn before dethatching, whether in the spring or fall. Cutting the grass down helps expose and remove the dead material and allows the machine to reach the thatch layer more easily.
Whenever you scalp the lawn, your yard WILL look beat up. Spring is a good time for this because the lawn is just coming out of dormancy anyway, so it doesn’t look great to begin with.
Mark sprinkler heads and drains
Mark anything in the lawn that could get damaged, such as sprinkler heads, pop-up drains, or other hidden fixtures. The last thing you want to do is create a NEW lawn project for you to do because you’ve done this one incorrectly.
This is especially important before using the scarifier attachment, since it digs in more aggressively than the dethatching attachment.
How to Use the Sun Joe Dethatcher
Once the Sun Joe dethatching machine is assembled and your lawn is prepped, it’s time to start dethatching!
Use the raking attachment
Make sure the thinner raking attachment is installed when you’re only wanting to dethatch, but not scarify. This is less invasive on your yard (but also pulls up less thatch).
Set the height correctly
The height adjustment knob has settings at 10, 5, 0, -5, and -10.
For the Sun Joe dethatching rake attachment, the recommended range is 0 to 10. I usually go with 0, which is the lowest setting recommended for this attachment. If you’re going to go to the work of doing this on your yard, you might as well make it worth it!
Connect the extension cord
Plug in an extension cord that is rated for outdoor use and long enough for your yard project. Secure it using the built-in cord holder that comes with the Sun Joe, so it does not come unplugged while you dethatch.
Start Dethatching on the side closest to your power source
PRO TIP: Start where your extension cord is plugged in and work away from it. That makes cord management much easier and keeps you from dragging the cord across the area you just finished dethatching.
Turn the SunJoe Dethatcher on
To start Sun Joe, push in the safety button and pull the handle bar in at the same time. The machine will stay on until you let go of the handle. It has some kick to it, so be ready for it to jump forward as soon as you turn it on!
Make two dethatching (or scarifying) passes in different directions
For the best coverage when dethatching with the rake attachment (or scarifying with the blades) always do two passes. For the first pass, go one direction, and then go perpendicular on the second pass.
That pattern helps pull material from more angles and gives you a more even result across the lawn.
Is the Sunjoe Bag Worth Using?
I tested the collection bag on the 15inch Sun Joe Dethatcher, and it filled up quickly. After just one pass there and back, it was already around three-quarters full.
The see-through design is a nice touch because you can see how full it is, but it still leaves quite a bit of thatch behind on the lawn. If you still have to rake or blow debris into piles afterward, the bag does not save much time.
For that reason, I took it off and finished the job without it.
How to Clean Up the Thatch
After your first pass, you need to clean up the dead material you pull up before doing your second pass.
You can do this one of three ways:
- A rake for larger piles
- A leaf blower to move lighter debris
- A mower with the deck raised to make pickup easier (for lighter thatch piles)
In my yard, I often use the mower for quick cleanup when there is not a huge amount of material sitting on the surface.
How to Use the Sun Joe Scarifier
After testing the dethatching attachment, I swapped in the scarifier attachment for the second pass to show the difference.
Lower the height setting
For scarifying, the recommended height setting is 0 to -10. I usually go all the way down to -10 when I want the most aggressive result. This will till/aerate the soil more, allowing for more oxygen into the soil, and my grass has always recovered.
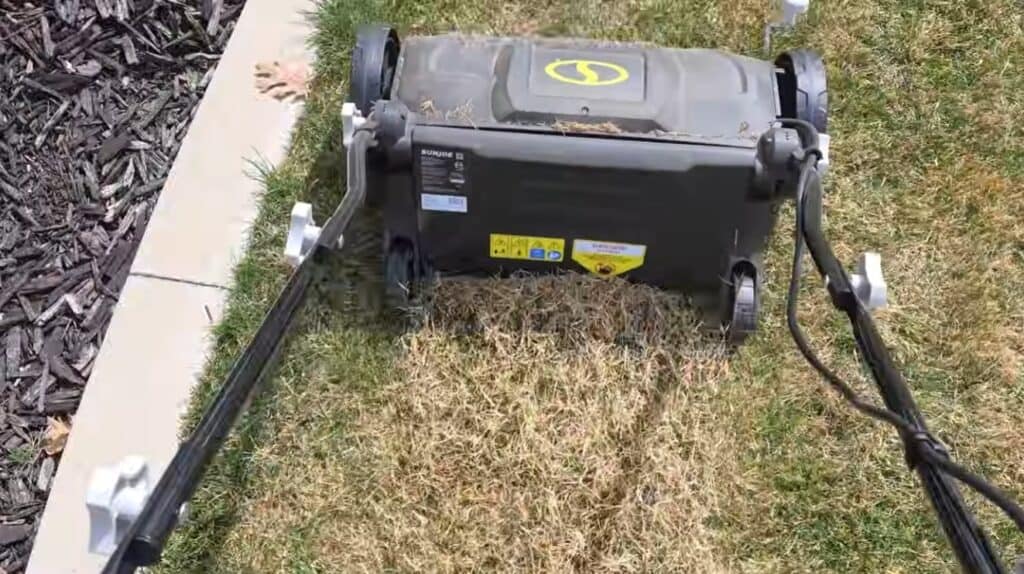
Expect more material to come out of your grass
The Sun Joe scarifier attachment pulled up much more thatch than the dethatching attachment in my lawn. It also left visible grooves in the surface, which can be useful when you want to open up the lawn for seed, topdressing, or leveling work.
Use scarifying for bigger lawn projects
The Sun Joe scarifier attachment is especially useful for when you’re wanting to some bigger lawn projects in addition to just cleaning out the thatch layer. Some of those big grass projects include:
- Spring or Fall Overseeding
- Lawn leveling
- Fall Nitrogen Blitz / Spring Nitrogen Mini Blitz
- Opening compacted surface material
- Pulling up matted dead grass
- Light surface aeration benefits
If your lawn has a lot of matting or buildup, the Sunjoe scarifier usually gives more dramatic results.
Dethatcher vs. Scarifier: Which One Worked Better?
In my yard, the Sunjoe scarifier attachment clearly pulled up more material than the dethatching attachment.
The raking attachment still worked, but the scarifier was more aggressive and gave a more noticeable cleanup. That has been my experience with older Sun Joe models too. I like the idea of killing two birds with one stone and both dethatching and aerating my lawn at the same time with the scarifier attachment.
That said, the right attachment depends on your lawn and your goal.
Use the Sunjoe dethatching attachment when:
- You want a lighter cleanup
- Your lawn only has mild buildup
- You do not want to dig in too aggressively
Use the Sunjoe scarifier attachment when:
- Your lawn has a thick mat of dead material
- You are prepping for overseeding
- You want stronger surface opening
- You want a more aggressive result
My Review of the Sunjoe Dethatcher and Scarifier
After using this newer version, a few things stood out right away.
What I liked
Here are the pros of the newer 15inch 13A Electric Sun Joe Scarifier and Dethatcher:
- The new model feels a little more powerful than the older versions I’ve used.
- It moves faster, feels sturdier, and the dethatching attachment seems improved over past models.
- The scarifier attachment is still my favorite part of the machine. That is the setting I see myself using most often because it does such a good job pulling material up and opening the lawn surface.
- For the price, it is a very useful tool to have around if you do your own yard work.
What I did not like
Here are some of the cons I noticed when reviewing the Sun Joe Dethatcher:
- The machine still has a somewhat plastic feel to it. It works well, but it does not feel like a commercial-grade machine.
- The bag is also still not a major selling point for me. It is a little better than older versions, but I still do not think it is the most practical way to collect debris.
- Without the bag, the flap on the back doesn’t open as easy as earlier models, meaning thatch can get stuck in the main unit for longer before being pushed out
- The setup of the handlebars was a little confusing in the manual.
Is the 15-inch Sun Joe Dethatcher and Scarifier Worth It?
At around $140-$160, I do think the 15-inch, electric Sun Joe dethatcher and scarifier is absolutely worth buying if you care about lawn maintenance and want a tool you will use more than once a year. If you were to hire this out or even rent a commercial dethatcher/aerator on your own for a single use, it would approach the cost of just buying one of these on your own.
This SunJoe Scarifier and Dethatcher can help with:
- Seasonal dethatching
- Scarifying before overseeding
- Cleaning up matted grass
- Opening the lawn surface before other projects
- General spring and fall lawn maintenance
For a homeowner who wants better lawn results without spending a lot on equipment, the Sun Joe is a solid option.
Where Do I Purchase the Sunjoe Dethatcher and Other Tools for the Project?
BUY 👉 Sun Joe Electric Dethatcher & Scarifier – https://amzn.to/4bVpdpd
BUY 👉 Contractor-Grade Trash Bags – https://amzn.to/48gPeiC
BUY 👉 Leaf Rake – https://amzn.to/4npip7s
BUY 👉Gloves – https://amzn.to/4leHEbn
Learn How to Use the Sun Joe Dethatcher/Scarifier!
The Sun Joe dethatcher and scarifier is an easy tool to assemble, simple to use, and useful for a wide range of lawn projects. If your grass has a heavy thatch layer or you are planning to overseed, level, or freshen up the yard in spring or fall, this tool can help you get the lawn ready.
The dethatching attachment works well for lighter cleanup, but the scarifier attachment is where this machine really stands out.
If you want to keep your lawn healthier, cleaner, and better prepared for growth, the Sunjoe dethatcher and scarifier is worth adding to your yard tool collection.