
Quick Summary – How to Winterize Your Sprinkler System with an Air Compressor:
- Turn off your sprinkler system water supply
- Release pressure and drain standing water from your lines
- Connect an air compressor (set to 40–75 PSI) using an adapter
- Blow out each sprinkler zone one at a time
- Repeat until only air comes out of each head (2-3 times with a pancake compressor)
- Close sprinkler zone valves and clean your water filter
- This simple process prevents frozen pipes and costly spring repairs.
(If you make a purchase using the links in this post, we may earn a commission.)
When the Halloween decorations go up, it’s a sure sign that freezing temps are on the way—and that means it’s time to winterize your sprinkler system in your yard.
While you could just ignore your sprinklers now that they aren’t running and hope for the best, it’s only a matter of time before something goes wrong. If you skip winterizing your sprinkler system, you risk cracked pipes, broken fittings, and costly repairs in the spring.
In this guide, I’ll show you exactly how to blow out your sprinklers with an air compressor to keep your irrigation system running smoothly come next season.
Why Winterizing Your Sprinklers Matters
So why should you blow out your sprinklers before winter? The most obvious reason is to avoid broken pipes. When water freezes, it expands. If that water is trapped inside your sprinkler pipes or heads, it can cause serious damage over winter.
The second reason to winterize your sprinkler system is to give you a chance to clear your lines, check for leaks, and make sure everything’s ready for next season. This is also a great time to pull out any water filters you have in your line (especially if you have a secondary water system feeding your irrigation) to clean them.
Removing debris from your filters ensures good water pressure when the water comes back on in the spring.
How to Blow Out Your Sprinkler System
Now that you understand why winterizing your sprinklers matters, it’s time to do the dang thing! Read on to find step-by-step instructions on how to blow out your sprinkler system with an air compressor!
For reference, I’ll go over some key points with both culinary and secondary water systems, but mine is a secondary water system, so that’s the area where I’ll be giving the most tips.
Step 1: Shut Off the Water Supply to Your Sprinkler System
Your first task when winterizing your sprinklers is to locate and shut off the water feeding your sprinkler system.
There are two common setups for water coming into residential irrigation systems – Culinary and Secondary. Culinary water systems pull from the water coming into your home (and typically utilize a backflow preventer to stop sprinkler water coming back in). Secondary water systems may still come from a city line (typically out in your park strip), but can also come from nearby reservoirs as well.
- How Do I Turn off My Sprinkler Water Supply in a Culinary Water System? – The shut-off valve is usually in your basement or crawl space. Turn the ball valve 90° to the off position.
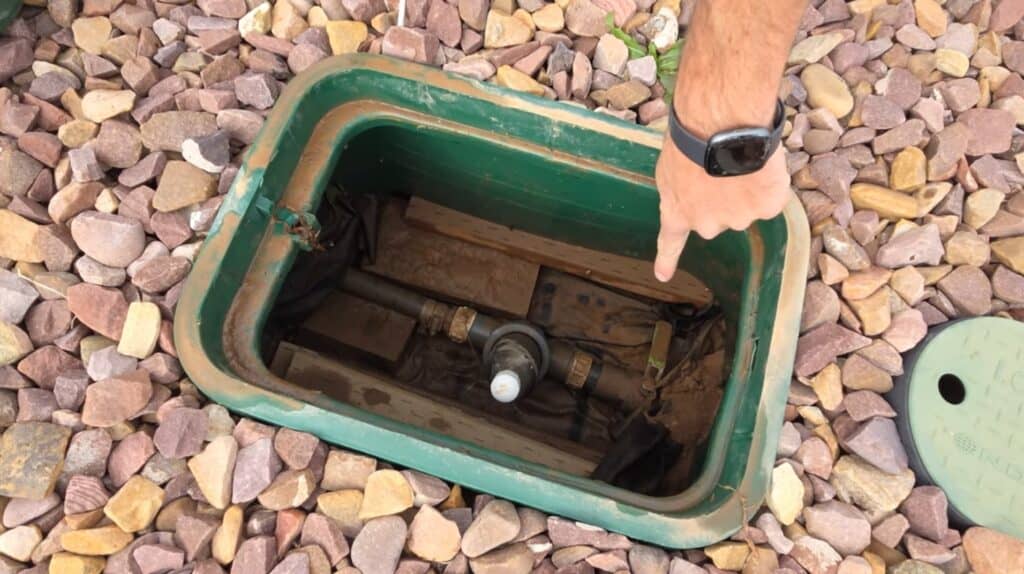
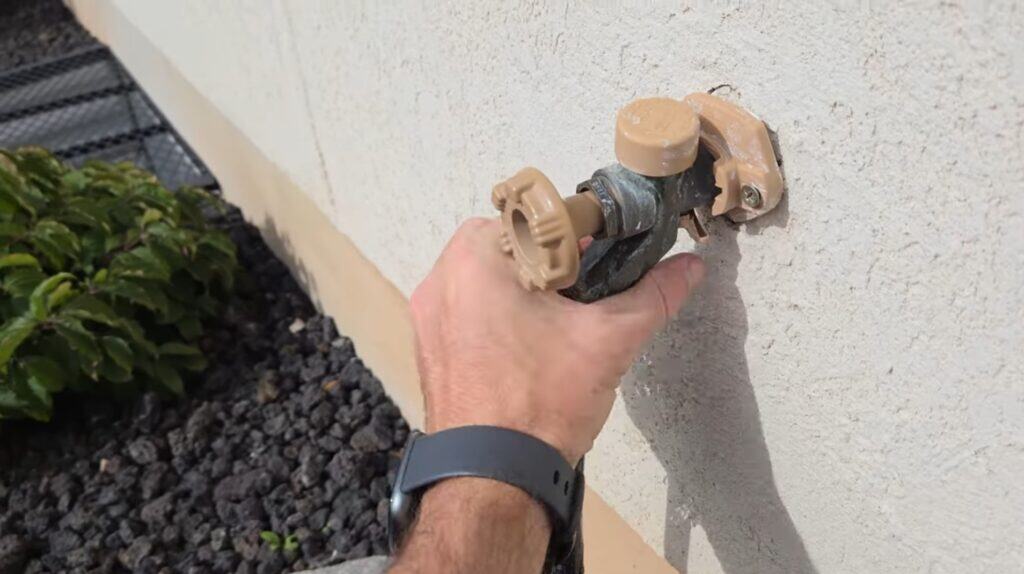
- How Do I Turn off My Sprinkler Water Supply in a Secondary Water System? – Look for a small sprinkler box with a shut-off valve somewhere in your yard near the main sprinkler line. This may be a spigot (turn to the right to shut it off), or it might also be a ball valve that can be turned perpendicular to the main line to shut it off.
After shutting off the water, open any small drains near the valve to release leftover water. For a sprinkler system using secondary water, you can typically unscrew the cap of your water filter and allow any water that has built up to drain at that point.
If your setup includes a backflow preventer (the U-shaped pipe outside your house), close its valves and drain it completely. This is also where you can connect your compressor if you’re on culinary water.
Step 2: Relieve Pressure and Drain Remaining Water
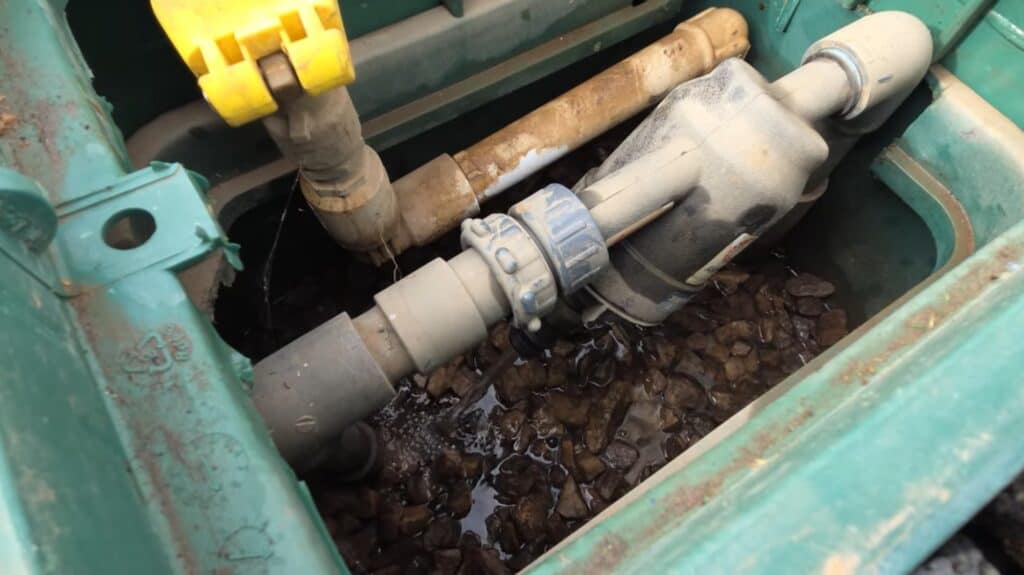
Once the water is off, open your water filter housing or any available valve to relieve system pressure. Removing the cap (or the filter altogether) will allow the water to drain out.
👉 Expert Tip! – If your property is on a slope, gravity will help pull water down toward the main line (especially if you have secondary water that comes in to your property from the park strip)—once your secondary water shuts off for the year, leave the valve to the main line open for a week or two to let the water pull out naturally if it’s not freezing yet.
Once you’ve drained the water filter (or at the backflow preventer), manually open each zone solenoid (valve) in your control boxes to release more water and pressure.
Let them drain out for a few minutes and then close them again before blowing out the system with an air compressor.
Step 3: Gather Tools Needed to Blow Out Your Sprinkler Lines

You’ll only need a few basic tools for the sprinkler blow-out process:
- Porter Cable Pancake Air Compressor (6 Gallon) – https://amzn.to/3WK6p52
- 25 ft Quick Connect Hose – https://amzn.to/3IQDAkq
- Winterizing Adapter Fitting (screws onto spigot or backflow fitting) – https://amzn.to/4hcz5ND
- 100 ft Extension Cord (in case your compressor is far from the spigot) – https://amzn.to/3KSakKM
Do Larger or Smaller Air Compressors Work Better When Blowing Out My Lines?
The short answer is larger air compressors work better. But that doesn’t mean a smaller air compressor won’t work, too.
While you could get a much larger air compressor when winterizing your sprinkler system, the only difference between that and a pancake compressor is the amount of time it will take to blow out all the lines. A larger compressor holds more volume and will allow you to blow them out quicker (this is what a landscaping or plumbing company would use if you hired them to winterize your sprinkler system).
Using a small air compressor (with less volume) will just require you to blow the lines out a couple of times to make sure all the water is out. Ultimately, smaller air compressors are a lot less expensive (and have multiple uses like filling up car tires, bike tires, winterizing an RV, etc.), so waiting a little longer to get my sprinkler lines blown out using a smaller one is still more worth it to me.
Connect the Sprinkler Winterization Tools Together
Once you’ve collected your sprinkler winterizing tools, it’s time to connect them together.
- Connect your extension cord to your air compressor and turn it on to get it filling the tank.
- Next, take the adapter and then attach it to the spigot that connects to your sprinkler main line (make sure the ball valve is turned to a 90-degree angle so the air won’t blow down the line!).
- From there, make sure the quick-connect hose is attached to the air compressor, and then connect it to the adapter, and you are set!
Step 4: Set the Right Air Pressure for the Compressor
Before starting to blow out your sprinklers, you need to adjust your air compressor pressure settings (PSI) to make sure you don’t damage your irrigation system in the process of winterizing it.
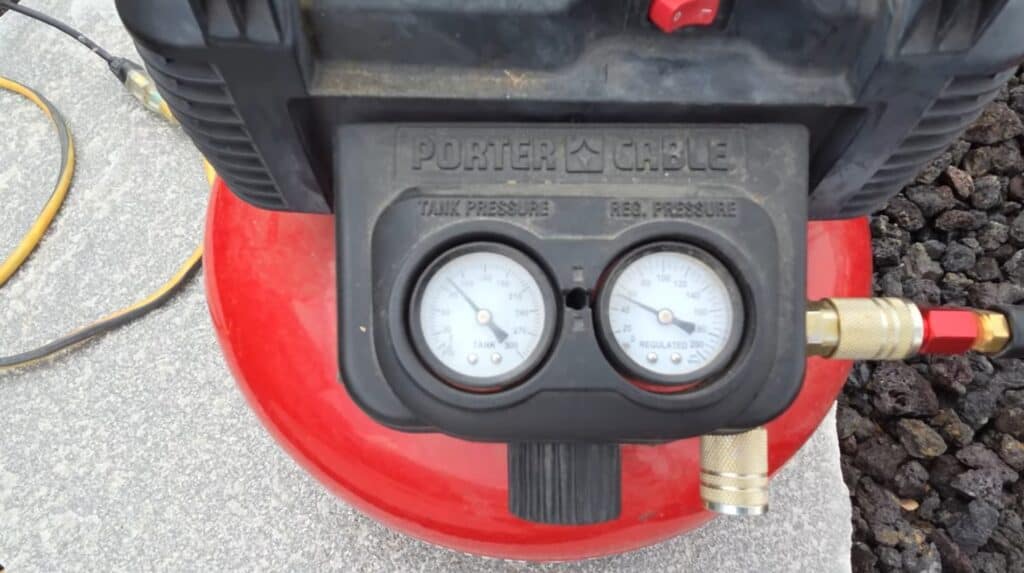
You’ll see two gauges—tank pressure on the left and regulated pressure on the right. The regulated pressure controls how much air goes into your sprinkler system and at what speed/pressure.
What is the Recommended PSI Setting For Blowing Out Sprinklers With an Air Compressor?
This depends on the type of sprinkler system you have. Here are recommended air compressor setting based on either a rigid or flexible pipe system:
- Rigid PVC pipes: 60–75 PSI (max 80)
- Flexible pipes: 40–60 PSI
👉 Expert Tip! – Always start low—you can add more pressure if needed, but too much air can damage your lines. I have rigid PVC pipes and still typically blow them out at the 45-50 PSI range.
Step 5: Blow Out Each Sprinkler Zone
Now it’s time to clear and winterize your lines!
- Open one zone manually or through your sprinkler app while no compressed air is going through the lines.
- Make sure the spigot you’re connected to is open (turn to the left).
- Make sure the air compressor is on and has fully filled the tank and is pressurized (45 PSI is a good place to start).
- Slowly open the ball valve on the adapter (so it’s parallel to the line) to let air into the line.
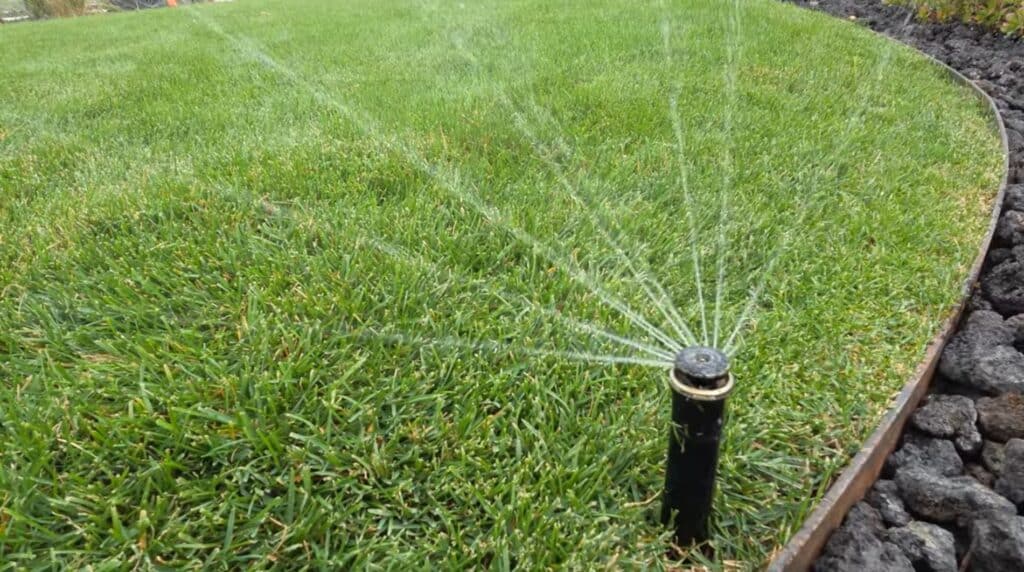
- Watch your sprinklers pop up and release water.
- When they start blowing mist or just air, turn off the air. You don’t want the system to run for too long with just air going through your sprinkler heads or they can get damaged.
- Close that zone, then move to the next. Repeat for each zone!
If your air compressor is small, blow out each zone twice to make sure all water is gone.
Don’t forget your drip lines—even though they have holes, they can still freeze. Blow out these zones as well!
Step 6: Blow Out the Main Sprinkler Line

Once all sprinkler zones have been blown out and winterized, connect your air compressor to the main line again. Open a spigot on the opposite side (or your water filter cap) to push out any remaining water. Repeat this 1-3 times to get rid of all the water in the main line.
After you’re finished, close all your spigots and valves.
Step 7: Disconnect Hoses from Spigots and Protect Hose Bibs
One last yard winterization tip that’s not directly related to your sprinkler system, but still important to do, is to remove any hoses attached to outdoor faucets or hose bibs attached to the house. Make sure to do this before the first hard freeze.
Leaving hoses connected to spigots or hose bibs traps water that can freeze and crack those connections. Nobody wants a broken hose bib come spring – trust me. A 30-second disconnect now saves you a costly repair later.
Next, drain the water from the hoses that you just removed so they don’t expand in the winter and get damaged as well. If you have room in your garage or a shed, you might want to just bring those hoses inside for the colder months.
Step 8: Clean the Sprinkler System Water Filter(s)

If you have secondary water, it’s smart to clean your filter before winter. This ensures you have optimal water pressure come spring. Here’s how you do that:
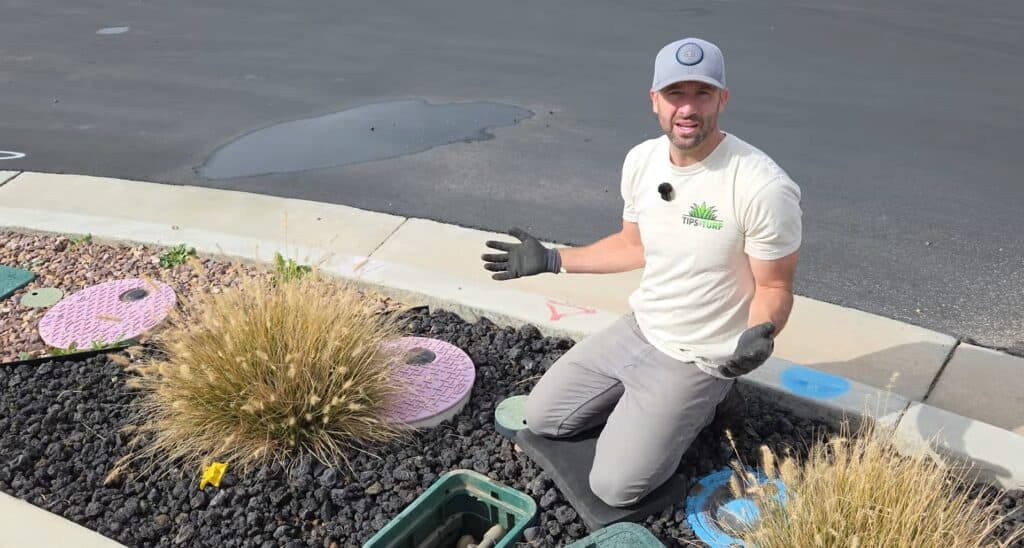
- Find your sprinkler box that houses the filter.
- Unscrew the cap and remove the filter.
- Rinse it with water, and use a toothbrush for built-up grime.
- Avoid washing large debris down indoor sinks—do it outside or in a garage sink.
- Reinstall the filter snugly so it’s ready for spring.
Winterizing Your Sprinkler System Sets You Up For a Healthy Spring Lawn
Winterizing protects your sprinklers—but there’s more you can do to help your lawn bounce back green and thick next year. Check out this post where we talk about other lawncare tips like a fall overseed to help your lawn come out ready to go in the spring!
Blow Out Sprinkler System FAQ
You should winterize your sprinkler system before the first hard freeze, typically in late October or early November, depending on your local climate. If temperatures drop below freezing overnight, it’s time to act.
For rigid PVC pipes, stay around 70–75 PSI (max 80). For flexible pipes, use 40–60 PSI. Always start low to avoid damaging your system.
Yes! A 6-gallon pancake compressor is strong enough for most home systems. You may need to run through each zone twice to fully clear the lines.
Trapped water can freeze, expand, and crack pipes or sprinkler heads, leading to expensive repairs in spring. Blowing out the lines prevents this.
Yes. Even though drip lines have small holes, they can still trap water that freezes and splits the tubing. Blow them out briefly with low pressure.
Typically, it takes 1–2 hours to fully winterize your system. The process includes turning off the water supply, relieving pressure, blowing out each zone, and cleaning the filter. The time depends on the size of your system and how many zones you have.
Yes, you can drain your system manually by opening drain valves and letting gravity pull out the water. However, using an air compressor ensures all the water is removed, reducing the risk of freezing and damage.
When blowing out the lines, the water should be replaced by a fine mist or air coming out of the sprinkler heads. If the sprinkler heads are still spraying water after you’ve released air, there’s likely still water in the system.
It’s a good idea to inspect and clean the sprinkler heads while winterizing your system. Cleaning any debris from the heads will help maintain proper water flow in the spring and ensure your system works effectively when you turn it back on.
Yes, professional irrigation services can perform a blow-out for you. While this ensures a thorough job, it can be costly. If you prefer a DIY approach, renting or purchasing an air compressor is a cost-effective solution.
As long as you set the correct PSI (40–80 PSI depending on your pipe type) and follow proper steps, blowing out your system will not damage the pipes. Be sure to start at a lower pressure and gradually increase if needed.
It’s better to winterize your system before the first hard freeze. If it’s already freezing, it may be too late to avoid damage. If your system hasn’t been winterized and temperatures have dropped, consider contacting a professional for emergency help.
It’s best to store your compressor indoors where it won’t freeze. If left outside, moisture can build up inside, potentially damaging the unit. Keep it in a garage or shed for best results.