

If your lawn has low spots, bumps, or an uneven surface, lawn leveling can make a huge difference in how it looks and feels.
Leveling can also be an opportunity to improve the soil profile, particularly if you’re dealing with heavy clay soil. In my own yard, I used fine sand as a topdressing after aerating the lawn. The goal wasn’t to bury the grass under a thick layer of sand. It was to fill low spots, smooth the surface, and allow the existing grass to grow right back through.
In this guide, I’ll walk through the complete process I used to level my lawn with sand, including scalping, aerating, spreading and leveling the sand, overseeding, watering, and what the lawn looked like two weeks later.
Want to see the entire process? Watch my complete lawn leveling, aeration, and overseeding video here:
Why Level Your Lawn?
The most obvious reason to level a lawn is to fix an uneven surface.
Soil can settle over time, foot traffic can create worn areas, and different parts of the yard can develop small dips and low spots. Leveling helps smooth those irregular areas and create a more consistent surface.
In my case, there was another reason: soil composition.
My yard has a lot of clay. I wanted to begin adding sand to the soil profile because sand allows air, water, and nutrients to move farther into the soil. Combined with aeration, this can help create better conditions for deeper grass roots.
For cool-season grasses, I prefer doing this type of project during the active growing seasons in the spring or fall, when the lawn has a better opportunity to recover.
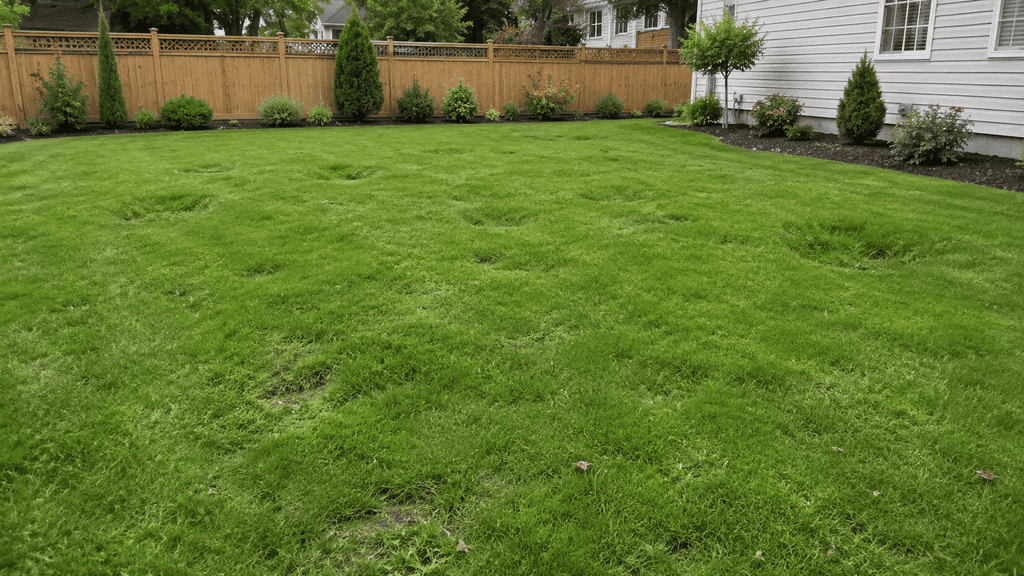
Step 1: Scalp the Lawn Before Leveling
Before putting any sand down, start by mowing the lawn very short.
Scalping simply means lowering your mower deck and cutting the grass as close to the soil surface as you reasonably can.
This accomplishes a couple of things. First, it removes some loose debris and dead material. More importantly, shorter grass makes it much easier to rake sand evenly across the lawn.
If the grass is left long, the blades interfere with your leveling rake and make it harder to spread the topdressing consistently. Shorter grass is also more likely to poke back through the thin layer of sand after leveling.
Don’t be surprised if your lawn looks rough immediately after scalping it. This process stresses the grass temporarily. In my lawn, I expected it to begin recovering within roughly one to two weeks.
Step 2: Dethatch or Scarify if Needed
The next preparation step is removing excessive dead material and thatch.
Dethatching and scarifying pull up dead grass and debris that have accumulated near the soil surface. Removing that material gives your topdressing better access to the soil instead of creating a layer of sand sitting on top of a thick mat of dead material.
I use a Sun Joe dethatcher and scarifier for this type of work. I had already dethatched and scarified this particular lawn recently, so I skipped that step during this project.
If your lawn has a noticeable thatch layer, however, I would address it before you begin leveling.
Buy here 👉 Sun Joe Electric Lawn Dethatcher & Scarifier – https://amzn.to/45Dfty7
(If you make a purchase using the links in this description, we may earn a commission at no additional cost to you.)
Step 3: Aerate the Lawn Before Adding Sand
If you have compacted or clay-heavy soil, core aeration is an important part of the process.
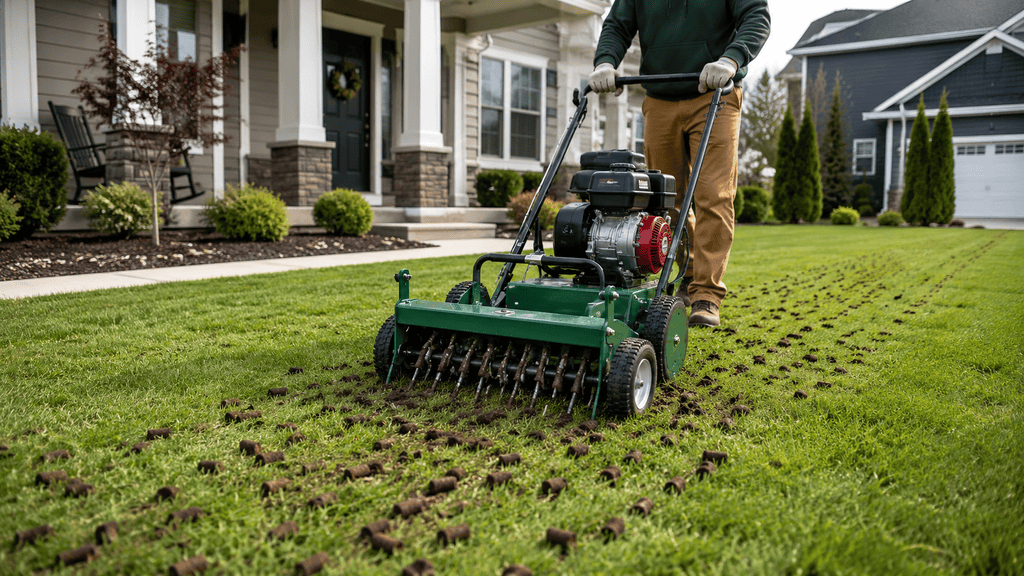
Healthy grass needs access to air, water, and nutrients. When soil becomes compacted from rain, snow, foot traffic, or general use, those things have a harder time moving down through the soil.
That can leave grass with shallow roots, which may cause it to struggle more during hot summer conditions.
Core aeration punches into the lawn and removes plugs of soil, opening channels where water, air, nutrients, and eventually some of your topdressing material can move into the soil profile.
Water Before Aerating
One important lesson, particularly if you have clay soil, is to make sure the ground isn’t rock hard before using the aerator.
I recommend deeply watering the lawn or aerating after you’ve received rain roughly 24 hours beforehand. Dry clay can become incredibly hard, making it difficult for even a heavy aerator to penetrate deeply enough to pull good cores.
For tight areas around drains or other obstacles where I couldn’t safely use the larger aerator, I followed up with a manual aerator.
Step 4: Remove the Aeration Cores
For this project, I removed the plugs left behind by the core aerator.
Normally, aeration cores can be allowed to break down naturally. But because the goal here was to create a smooth lawn surface, I didn’t want those cores potentially contributing to little bumps beneath the topdressing.
So before bringing in the sand, I cleaned them up.
What Is the Best Sand for Lawn Leveling?
Not every type of sand is ideal for leveling a lawn.
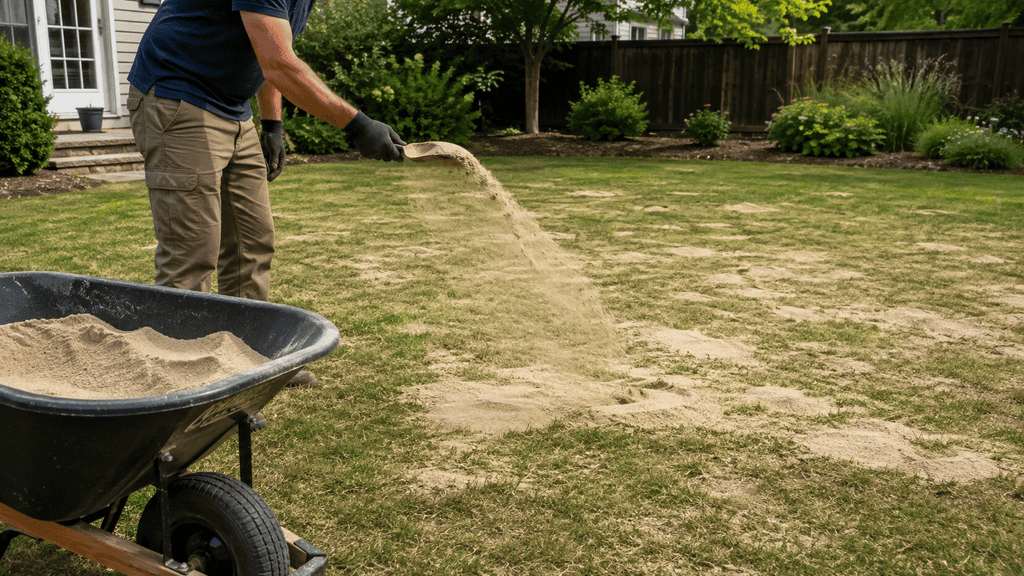
You want a fine-grit sand without salt or a lot of rocks and large particles. I would avoid a coarse all-purpose sand that contains lots of small rocks.
Some options discussed in the video include masonry sand and play sand. For my lawn, I used a locally available material called cyclone sand or blow sand. It had been refined into very small particles, which made it much easier to spread and work into the lawn.
The important principle is that the material should be fine enough to move through the grass and settle into low areas.
How Much Sand Should You Put on a Lawn?
This is where you want to be conservative. The goal isn’t to cover the lawn with a huge amount of material all at once.
For this project, I aimed for roughly ¼ inch to ½ inch of sand at a time.
As a general calculation from the project, about 1 cubic yard of sand per 1,000 square feet of lawn gives you approximately that amount of coverage.
If your lawn has significant low spots, don’t necessarily try to correct everything in a single leveling project. Some areas of my lawn will probably take several seasons to gradually raise to the level I want. That’s much safer than burying your grass under a thick layer of sand.
If you apply around an inch of material and completely cover the grass blades, you can kill the existing grass and end up needing to reseed that area.
Step 5: Spread the Sand Across the Lawn
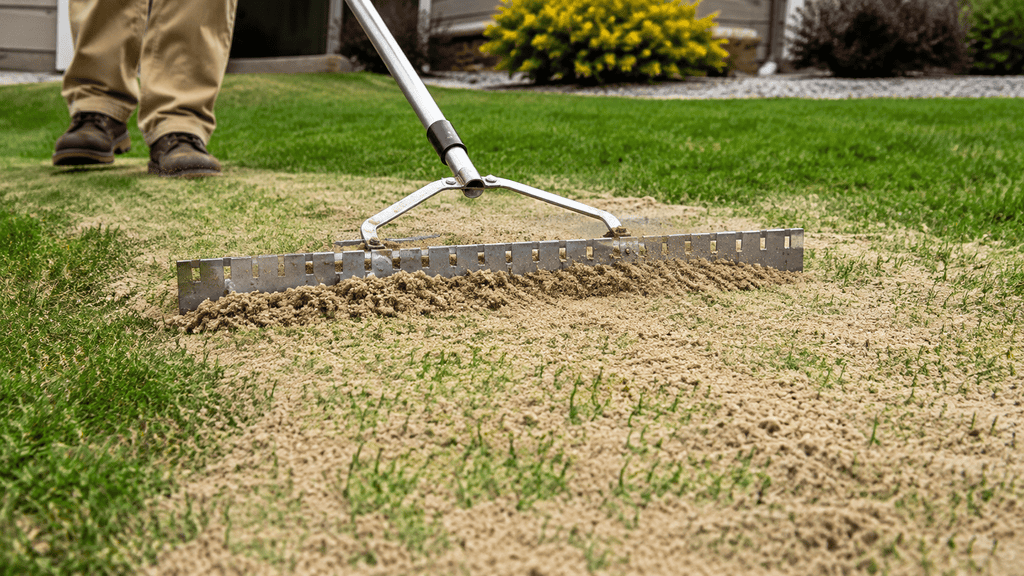
How you distribute the sand depends largely on the size of your lawn. For a large lawn, renting a topdressing or spreading machine can save a lot of time. My lawn was small enough, and I had enough access around it, that I used a wheelbarrow and manually threw the sand around the yard.
The important thing at this stage isn’t achieving a perfectly smooth finish. You’re simply trying to distribute the material relatively evenly so the leveling rake can do the finer work.
Step 6: Use a Lawn Leveling Rake
A lawn leveling rake is one of the tools I consider essential for this project.
Once the sand is spread out, pull the rake back and forth across the surface. The rake helps move sand out of higher areas and into the depressions and low spots that you’re trying to correct. Continue adding sand and raking it until you’ve created a noticeably smoother surface.
This doesn’t necessarily mean every low spot will disappear after one application. The goal is gradual improvement without smothering the grass underneath.
Step 7: Brush the Sand Down Into the Grass
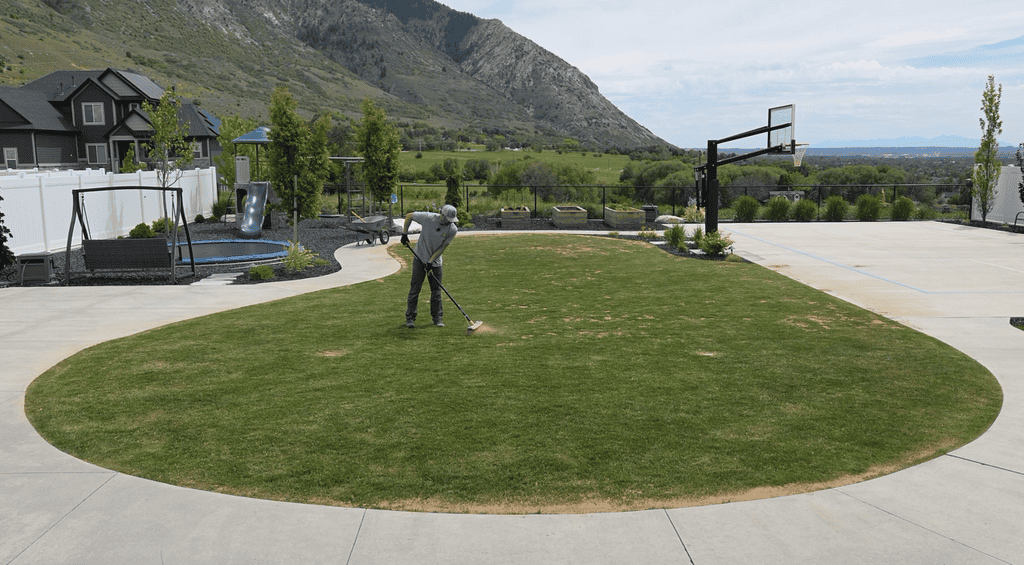
If your sand arrives slightly damp, you may notice clumps sitting on top of the grass. Rather than fighting those clumps immediately, I like to give the sand about 10 to 15 minutes to dry. Then I use a push broom to sweep the sand down through the grass canopy.
You’ll be surprised how easily fine sand disappears into the lawn once it dries and is brushed around.
This is also important because you want to uncover the tips of the existing grass blades. As long as the grass isn’t buried under too much material, it should be able to grow back through the topdressing.
Should You Overseed After Leveling a Lawn?
You don’t necessarily have to. After leveling, you can stop and simply allow the existing lawn to recover. But if you’ve already scalped, aerated, and topdressed the lawn, this can also be a great opportunity to overseed thin or bare areas.
That’s what I chose to do.
I overseeded my lawn with Night Shift Dark 30 perennial ryegrass, going around the perimeter first and then making passes in perpendicular directions to help achieve more consistent seed coverage.
Buy here 👉 Dark: 30 Grass Seed – https://thelawnlife.com/products/dark-30-formerly-blackout-2-0-pre-sale?sca_ref=9570198.tnSsFSCU50O&sca_source=Youtube
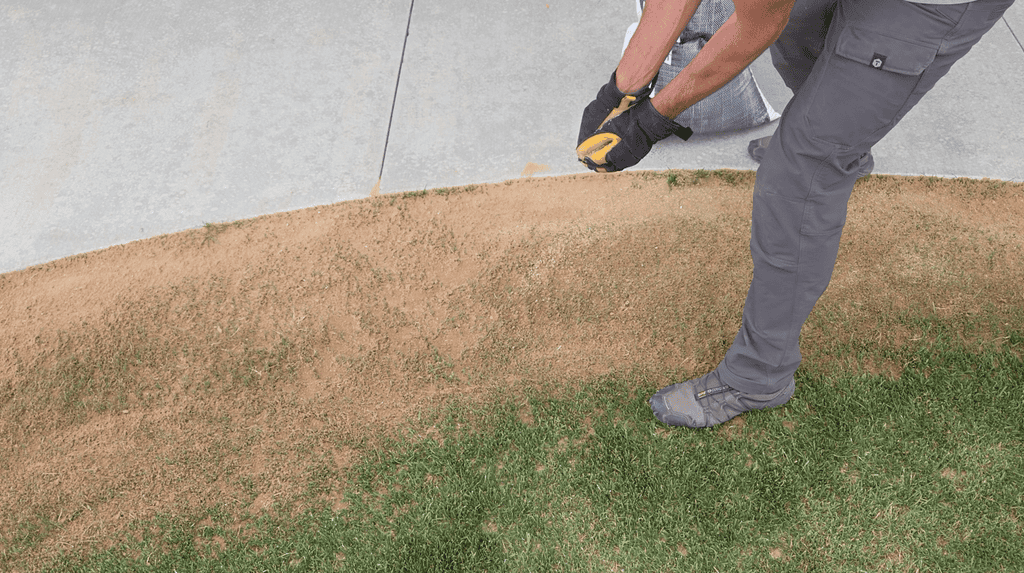
Use Peat Moss to Help Keep Grass Seed Moist
Overseeding on top of sand creates one additional challenge: sand doesn’t retain water very well. Water can move through it quickly, which means newly planted grass seed can dry out if you’re not paying attention.
To help with moisture retention, I applied a light layer of peat moss approximately ¼ inch thick.
I especially recommend doing this in bare areas. You can also use a light layer across a larger portion of the lawn if you want additional help keeping the seed moist.
Step 8: Water Everything In
Even if you don’t overseed, water the lawn after leveling. I recommend watering for roughly 10 to 15 minutes to help the sand settle down into the grass and low spots.
If you overseed, watering becomes even more important.
For the perennial ryegrass I planted, I wanted the seed to remain moist for approximately seven to 10 days. That meant watering roughly two to three times per day for about five to 10 minutes at a time.
Your exact watering needs will depend on your lawn, weather, soil, seed, and irrigation system, so the real goal is consistent moisture without allowing the seedbed to dry out.
What Did the Lawn Look Like Two Weeks Later?
Two weeks after aerating, leveling, and overseeding the backyard, the difference was already noticeable.
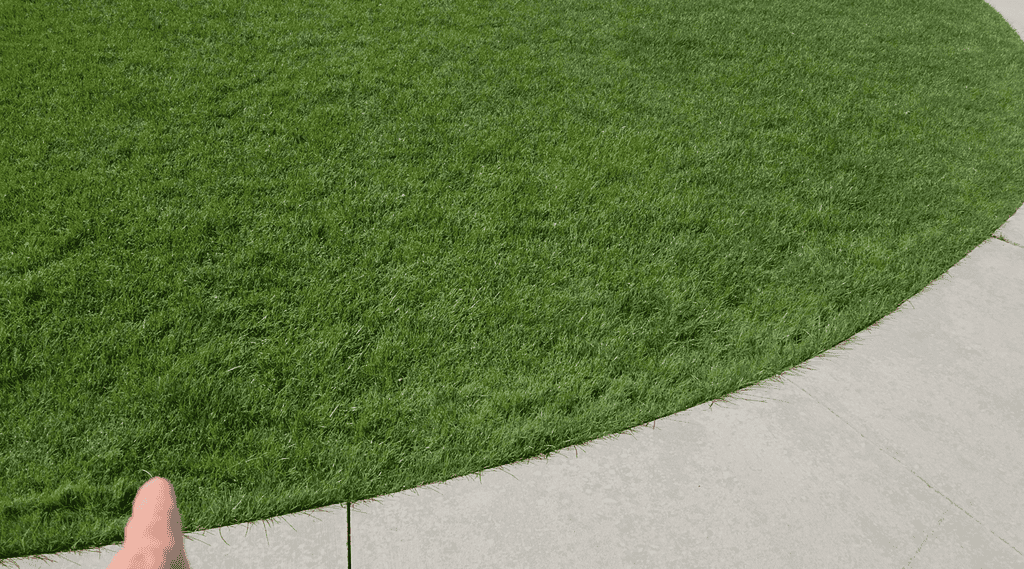
One of the main problem areas next to the concrete had been considerably lower before the project. After adding the sand and overseeding, the area looked much more level and had filled in with new grass. The perennial ryegrass had germinated in roughly seven days and was already several inches tall by the two-week update.
The lawn wasn’t suddenly perfectly level everywhere, and I still have areas that I’ll gradually raise over future seasons.
But that’s really the point.
Lawn leveling doesn’t have to be a one-time, massive application. Making smaller adjustments over time lets you smooth the lawn while reducing the risk of burying and damaging the grass.
How to Level a Lawn Without Killing the Grass
The key is restraint. Don’t treat leveling like you’re laying down a new layer of soil several inches deep.
Your grass still needs access to sunlight and air. The sand should work down around the grass blades and into the low spots rather than completely covering the plant. Applying around ¼ to ½ inch at a time, brushing the material into the canopy, and leaving the grass tips exposed gives the existing lawn a much better opportunity to recover.
For particularly deep low spots, plan on correcting them over multiple leveling sessions instead of trying to fix everything in one afternoon.
Now Go Start Leveling!
Leveling a lawn is definitely some work, but the process itself is fairly straightforward:
Prepare the grass, aerate the soil, add a manageable amount of fine sand, work it into the low spots, and give the lawn time to recover.
If you’re also dealing with thin or bare areas, you can take advantage of the project by overseeding at the same time.
The biggest mistake I’d avoid is trying to fix a severely uneven lawn with too much sand in one application. Think of leveling as a gradual process. A few careful applications over multiple growing seasons can give you a smoother lawn without smothering the grass you’re trying to improve.
And if you want more practical lawn-care tips, product recommendations, and help figuring out what your grass actually needs, join our Skool community!
Frequently Asked Questions About Lawn Leveling
Yes. Fine sand can be spread over the surface and worked into low areas with a leveling rake. The goal is to use a relatively thin layer instead of burying the existing lawn.
For this project, I used a target depth of approximately ¼ to ½ inch at one time. The calculation used in the video was roughly one cubic yard per 1,000 square feet of lawn.
Look for a fine-grit sand without salt or lots of rocks. Masonry sand, play sand, or a similar finely processed sand may work depending on what’s available in your area.
I recommend aerating first when you’re dealing with compacted or clay-heavy soil. It opens the soil profile and creates channels for air, water, nutrients, and topdressing material.
Yes. I overseeded immediately after leveling. Because sand drains quickly, however, you’ll need to pay close attention to moisture. A light peat moss covering can help retain water around the seed.
In this project, I expected the existing grass to recover in roughly one to two weeks. At the two-week update, the lawn had already filled in significantly and the newly seeded perennial ryegrass was growing well.